Secure Print for Fiery-Enabled Devices
Follow these instructions to configure the Fiery Controller Support add-on to an existing SLNX system. This add-on allows you to release secure print jobs to a Fiery-enabled device. Configuration steps are required within the SLNX Management Console.
Only users who log in to the Management Console with a Customer Engineer role can add the required entries to the Delegation Server keys. Refer to Overview of System Roles for instructions regarding roles.
Update the device details with the Fiery
-
In the Device List, select the device that has a Fiery controller.
-
Enter the address of the Fiery in the "Fiery Controller Address" field.
-
Click [Save].
Enable XSC
-
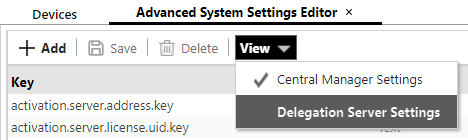
Click [System] ⟶ [Server Settings] ⟶ [Advanced System Settings Editor].
If this option is not available, you are not logged into the Management Console with the required Customer Engineer role.
-
Change the View to Delegation Server Settings, shown below.
-
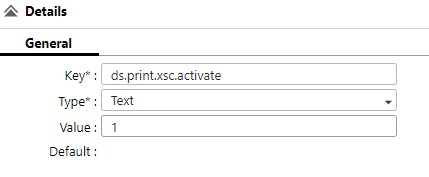
Click Add, and then add a new entry where the key is “ds.print.xsc.activate” with the type of “Text” and a value of 1.
-
Click [Save]
Install SLNX Embedded on the Device
If it’s not already installed, proceed to install SLNX Embedded on the device. X ref to the install. After the installation, the device is ready to release jobs through the Fiery controller.
Reprints from Fiery Command Workstation will not count/track in SLNX.
Print Driver Considerations
There are two print driver approaches:
-
Use the same Print queue as rest of SLNX fleet (PCL/PS Universal driver):
Jobs will print but may not print colors / finishing / tray selection etc. correctly due to not using Fiery Driver.
-
Use Fiery-specific driver:
-
Allows the user to choose Fiery options features.
-
Places different jobs into a user queue, some jobs from Universal and Fiery.
-
It is not possible to limit the Fiery to see only Fiery jobs.